QbeesQuest offers card-making ideas, paper crafting tips and tutorials. Brenda Quintana Independent Stampin' Up! Demonstrator. Order Stampinup on-line
Friday, March 24, 2017
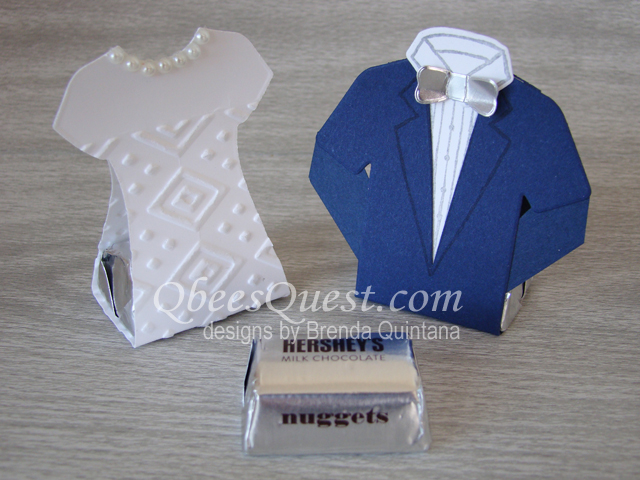
Bride & Groom Nugget Favors
These Bride & Groom Hershey's Nugget favors are made with the Custom Tee Bundle. The favors are made by scoring and die-cutting the t-shirts out of one piece of card stock. They would make great favors for weddings, showers, proms or dances. Just click on my video tutorial above to learn how to make them. This favor is part four of a four part series.
All the supplies you'll need for this project are available for purchase HERE!


OMG, I LOVE THESE. Thanks so much for doing these. I can't wait to make a set and show to the Bride to be.
ReplyDeleteI'm so glad you like them, Deb!! :) AND thanks for suggesting it.
DeleteYou never cease to amaze me with your talents! These are amazing! Thank you for sharing them with us. :)
ReplyDeleteYou're welcome, Sherri!! :)
DeleteThese are so cute!! tanks for sharing.
ReplyDeleteThank you, Zoe!! :)
Delete