Earn a FREE tutorial from me when you place a minimum $15* order
in my Stampin' Up Store
See your tutorial choices HERE
Fox Kiss Tent
- Start with a 4" x 7/8" piece of Calypso Coral card stock. On the 4" side, score at the 1", 2" and 3" marks. Fold along the score lines. Put Tombow on one of the end segments and adhere together to form triangle.
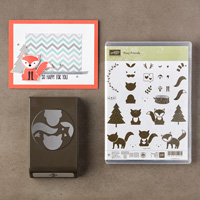
- Stamp the for body, head and tail on a 5-1/2" x 1-1/4" strip of THICK Whisper White Card Stock in Calypso Coral Ink (shown above). Punch with the fox builder punch.
- Also punch matching fox pieces (body, head, tail) out of Calypso Coral card stock to act as backing pieces.
- Start with a 4" x 7/8" piece of Smoky Slate card stock. On the 4" side, score at the 1", 2" and 3" marks. Fold along the score lines. Put Tombow on one of the end segments and adhere together to form triangle.
- Stamp the raccoon body, head and tail on a 5-1/2" x 1-1/4" strip of THICK Whisper White Card Stock in Smoky Slate Ink (shown above). Stamp the raccoon mask and the tail stripes in Basic Gray ink. Stamp the eyes and nose in Tuxedo Black Ink. Punch with the fox builder punch.
- Also punch matching raccoon pieces (body, head, tail) out of Smoky Slate card stock to act as backing pieces.
- Start with a 4" x 7/8" piece of Basic Black card stock. On the 4" side, score at the 1", 2" and 3" marks. Fold along the score lines. Put Tombow on one of the end segments and adhere together to form triangle.
- Stamp the skunk body and head on a 5-1/2" x 1-1/4" strip of THICK Whisper White Card Stock in Tuxedo Black Ink (shown above). Punch with the body and head with fox builder punch. Also punch a Whisper White tail, eye mask and hair tuft. Stamp the stripes on the tail and the eyes and nose with Tuxedo Black ink.
- Also punch matching skunk pieces (body, head, tail) out of Basic Black card stock to act as backing pieces.
- Start with a 4" x 7/8" piece of Delightful Dijon card stock. On the 4" side, score at the 1", 2" and 3" marks. Fold along the score lines. Put Tombow on one of the end segments and adhere together to form triangle.
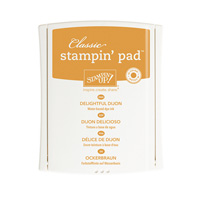
- Stamp the fox pieces on a 5-1/2" x 1-1/4" strip of THICK Whisper White Card Stock in Delightful Dijon Ink (shown above). Stamp the cat face in Tuxedo Black ink. Punch with the fox builder punch.
- Also punch matching cat pieces (body, head, tail) out of Delightful Dijon card stock to act as backing pieces.
Stampin’ Up! Supplies
click on the product for price and details


These are just too cute!
ReplyDeleteThank You, Linda!! :)
DeleteCan't wait to make a bunch of these!!!
ReplyDeleteI'm so glad you like them, Louise!! :)
DeleteHi Brenda, Oh my goodness, the cute! Thank you so very much for generously sharing your video & amazing tips for stamping & punching the animals so easily. They are all so helpful & you made the process easy. You're brilliant!
ReplyDeleteInky wishes, Di :)
Di, You're so welcome!! I'm glad you like them. :)
DeleteAmazing Brenda! I just followed along with your video and made a bunch of these. Your hints and tips were so concise and easy to follow and no wasted card stock. Thanks for sharing. Have a lovely weekend. Cheers Donna Z :)
ReplyDeleteDonna, you're so welcome!! Have a great weekend too!! :)
DeleteSuch adorable critters, Brenda! I loved your tips and tricks; which eyes to use, the skunk tail stamping (smart!!), etc., but the projects themselves are just the cutest! Thanks for sharing it all with us, I'm going to make some, now! Cheers! :)
ReplyDeleteThanks so much, Donna!! I'm glad you like my little critters. :)
Delete:-) (I made four foxes last night and can't wait to get back to playing later today!) XOXO
ReplyDeleteI'm glad you had fun making them. Have a great day!! :)
DeleteBrenda,
ReplyDeleteThank you for sharing this cute project. It's the perfect little treat to give my customers at my upcoming Woodland Christmas card class, featuring Foxy Friends! I cranked out 8 foxes this afternoon and tomorrow, rackycoons (as my daughter calls them). Thanks again!
Thanks Carrie!! I hope your customers like the foxes and the rackycoons (too cute)!!
Delete